Thursday, August 13, 2009

Day 11 - Fun with Glue


Okay moms, this was a tough one for me. Glue. Sticky, messy, slimy glue. But I thought, what the hey, he is going to have to learn about it sometime. Might as well jump in.So first things first, we must all learn from my mistakes...put newspaper down on the kitchen table BEFORE you give them the glue.

I went to the dollar store and picked up a whole bunch of supplies, and this is the best time to do it! Even Michael's has plenty of back to school sales, and that's great even when your child is not going to school yet.

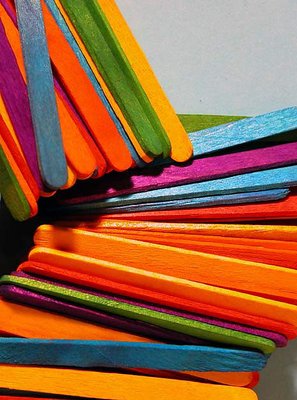
I got some multi coloured popsicle sticks, some googly eyes, and some colourful feathers. I also got some great construction paper, and of course....glue.

I basically just let them at it. They glued, and pasted, and glued some more.


They made monsters on paper and popscicle sticks, and birds of all sorts. They really enjoyed the freedom of allowing the creative juices to flow. (and I really enjoyed to facilitate.)

When it was all said and done, we had some beautiful creations, and K got a real kick out of pulling dried glue off his hands.

Monday, August 10, 2009

Day 10 - Ice Sculpting


What fun you can have with Ice on a hot summer day!

We took 3 freezable plastic icecubes and placed them with a plastic SCUBA diver and froze them in a bucket of water.

The next day after they had all frozen together, we gave our son a butter knife and he used it as an ice-pick to dislodge the ice
cubes.
The SCUBA diver was a little harder to get out. But after trying to melt the ice in the sun, throwing it as a block on the concrete,(allowing the pieces to break off) and adding sand to wear it down, the SCUBA diver came out at last.


My kids worked on this activity for over an hour. The only advice I have to moms wanting to do this with their kids is to get some goggles to protect the eyes!!

On Summer Hiatus

Now it would seem that this a a dead blog, but I promise you dear readers, it is not. I like to include a picture of the daily activity that we attend to and before this moment it was getting increasingly harder to publish the pictures. My computer would not read them and my camera would not send them.
Enter my new computer and new camera.
Let the posting begin!

Monday, March 16, 2009

Day 9 - Water Play

Who needs a water table? Certainly not us! We got this idea from Granny, as she said that Daddy used to spend all of his time at the kitchen sink. (so that's why her house is always spotless! ;P )


We filled up one side of the sink with Yellow food colouring and the other with Red. I made sure that K had plenty of Bubbles.


The great thing about water play is that they are learning without you really having to explain much. Buoyancy, absorption. what happens when something gets too full (it lands on mommy's floor), using funnels. K spent a good hour playing with the water.


While K preferred to use cups and cup measures to play with the water in the sink.............


R was much more interested in using the modern conveniences of life.

Friday, March 13, 2009

Day 8 - Playdough!


There is no other activity that can keep kids entertained than playdough...well maybe fingerpainting. I bought this great playdough kit from Mellissa and Doug and K and R can both spend hours reshaping and molding the dough to their liking.

The great thing about play dough is that the possiblities are endless. You can choose a theme, like animals and both try to make as many animals that you can think of, or plants, or cars! You can also make different make-believe animals and mix the play dough *gasp ;P

Another way to play with the play dough is to use different utensils to see how each item interacts with the playdough. A spoon, a fork, or even a meat tenderizer are all great around the house items to explore.

And because you can never get enough play dough, here is an easy non-toxic recipe to make your own. You can also use different things such as scents, colours and textures to make it that much more fun!

Recipe for Play Dough.

* 1 cup of flour * 1/2 cup of salt
* 1 cup of water * 1 tsp. oil
* 2 tsp cream of tartar
* food colouring

Mix together all ingredients and cook for 3 mins over low heat.
Stir Well, and store in a plastic container once cooled.

Get Creative!

Thursday, March 12, 2009

Day 7 - Dirty Monster

K came up with this idea all by himself. It's called the "Dirty Monster".
Basically we took recyclable garbage and created a body, arms, legs, eyes, and hair.
It's fun to let the kids have a go with scissors. (as long as there is adult supervision)
K loved to cut all of the shapes and unstick the stickers.
We used foamies for eyes, a Playdoh container for the body, and corrugated cardboard for the hair.

Wednesday, February 18, 2009

Day 6 - Cards

This is a sad kind of post, but an activity none the less.
My grandmother (K & R's Nana) happens to be in the hospital right now, and I went to visit her yesterday, and K wanted to come, but he couldn't, because it is the Cardiac Intensive Care Unit, so I told him that we would make her a card.
So I took out a card I had that said "Thinking of You" and K decorated that card for over an hour.
Some items that he used were stickers, markers, and foamies. Some other items that you could use would be paints, the de doodles from Crayola are great, some ribbon, and any assortment of stickers from the dollar store.
These cards look great from the outside as they say a message, but the inside is great too, because kids at this age have trouble printing their names, and by doing this instead it still makes them feel included.
Happy Crafting!

Sunday, February 15, 2009

Day 5 - FingerPainting!!!!


What is more fun than FingerPainting? Nothing!
The boys and I engaged our creative sides by using some great fingerpaints and some direction from Usborne.

K had so much fun swirling the red, the green and the blue. R had more fun trying out the textures and trying to eat them, rather than painting with them.


Finger painting is one of those activities that you can do with little to no preparation. You can find some great recipes for
paints, and you can use different things such as forks, spoons or sponges to show how great of an artist you are!

Get Creative!

Friday, February 13, 2009

Day 4 - Eye Spy

There is nothing like a good game of "I Spy" to get the kids learning colours. This is the one game that K loves, he could play it for hours.
The great thing is that you can be versatile with what you choose to spy. For little learners, just getting a handle on colours or words, you can start with the quintessential "I spy with my little eye, something that is Red." or maybe use sounds, "something that say woof." or "something that is used for cooking."
As the kids get older you can use multiple colours, such as "something that is red, green and blue." and then start using sounds, "something that starts with the letter B." and even, "something that rhymes with took."
The possibilities are endless and you could really do this in anywhere. At the doctors, "many things that are yellow." (files.), in the car "a licence plate that starts with 'W'." or even on the computer.
Happy Seeking!

Thursday, February 12, 2009

Day 3 - Helicopter Twist


By using simple
Twist Ties the boys and I made a variety of different play things.
I took five twist ties and showed K that by using imagination you can make anything. We made a helicopter, a person, as well as a balloon.


K was so intrigued that I could make these "cool" things with something as easy as Twist Ties.

So go on!
Find some different items that can be recycled, cardboard, bottles, twist ties and bottle caps and get creative!


Wednesday, February 11, 2009

Day 2 - Tea Party


Who says that Boys don't like to be fancy?

Today we decided it would be fun to have a tea party as K is going to have one at Preschool coming up. We got out his little set, like the one you see here, and set them out. A blue on for me, a "lello" one for K and a orange one for R.
K was pouring and telling me to use my "magination" to stir, since we had no spoons.
R started to get a little frustrated that we would not let him clash the saucers together to make music. (note for readers: Get a plastic one for the little guys)
Of course it was going so well, and I thought, "See, boys can play quietly with toys marketed to girls...." When K took the saucers from the tea set placed them on his chest and exclaimed, "Now I have boobies, just like you!"
Well, flattery will get you everywhere, especially if you are a 3 year old boy.

Tuesday, February 10, 2009

Day 1 - Yoga

With the help of Itsy Bitsy Yoga our very first activity was Yoga!
K loves doing the mountain pose,

the downward facing dog and the child pose.

R just liked to watch!
I feel that Yoga for Kids doesn't have to be as regimented as some would argue. Learning to breathe is a great way to calm temper tantrums, and promote a calming and peaceful day.
With all activity's you have to make sure that your kids are open to the experience, so I would suggest doing Yoga bright and early in the morning or late at night just before bed. This is when they are most receptive.
There are lots of classes that teach yoga for kids, such as Growing Up, ItsyBitsy, Yoga4KidsCalgary, StoryTime Yoga, but doing the moves at home can really bond parent and child.
A great place to start would be a Yoga book as described above or Yoga Cards can be great too!
Get down on their level and just have fun with it, and maybe you can work it into your routine for a more balanced you.
Namaste.